Installing a new freezer may seem straightforward, but without proper preparation, the process can quickly become stressful and time-consuming. Whether you’re upgrading to a larger model, replacing an old freezer, or adding a secondary unit, careful planning is essential for a smooth and hassle-free installation. In this guide, we’ll walk you through the steps to prepare your space effectively, ensuring a seamless experience when using professional freezer installation services, like S.T.A.R. Appliance Repair.
1. Choose the Right Location
The first step in preparing for a freezer installation is selecting the right location. Consider the following:
-
Ventilation: Freezers require proper airflow to operate efficiently. Avoid cramped spaces or areas where the back of the freezer will be flush against a wall. Leaving a few inches of space behind and on the sides ensures adequate ventilation.
-
Level Surface: Place your freezer on a stable, level surface. Uneven flooring can cause the freezer to tilt, affecting performance and longevity.
-
Accessibility: Ensure the freezer door can open fully without obstruction. This will make it easier to load and unload items and perform routine maintenance.
-
Electrical Requirements: Most freezers need a grounded outlet. Confirm that the location has the proper electrical setup, ideally without extension cords.
By carefully choosing the placement of your freezer, you prevent potential problems and maximize efficiency.
2. Clear and Clean the Installation Area
Before the installation team arrives, it’s important to clear the surrounding area. Remove any furniture, boxes, or other obstacles that may block access to the installation site. A clutter-free area not only helps S.T.A.R. Appliance Repair professionals work more efficiently but also minimizes the risk of damage to your belongings or the freezer.
Additionally, clean the floor and surrounding walls. Dust and debris can interfere with installation and affect the longevity of your appliance. A clean, organized space sets the stage for a smoother process.
3. Measure Your Space Accurately
Nothing is more frustrating than ordering a freezer that doesn’t fit your space. Take accurate measurements of:
-
The width, depth, and height of the available area
-
The distance between the wall and any obstacles like cabinets or counters
-
The clearance needed for the freezer doors to swing open fully
Compare these measurements with the specifications of your new freezer. Providing these details to your freezer installation services team ensures they bring the right equipment and can plan the installation without delays.
4. Prepare the Electrical Connection
Most modern freezers require a dedicated, grounded outlet. Before installation:
-
Verify that the outlet is compatible with your freezer’s power requirements.
-
Avoid using extension cords, which can be dangerous and may void the warranty.
-
If necessary, consult an electrician to install a new outlet or upgrade your existing one.
Having a ready and safe electrical connection prevents last-minute interruptions and allows S.T.A.R. Appliance Repair to complete the installation efficiently.
5. Remove Packaging and Old Appliances
If you are replacing an old freezer, it’s important to remove it carefully. Disconnect the appliance from the power source, defrost if needed, and clear out any remaining food items. For larger freezers, you may need assistance to safely transport the unit out of the space.
Similarly, remove all packaging materials from the new freezer, such as cardboard, plastic wrap, and protective films. This simple step ensures your appliance is ready for immediate installation.
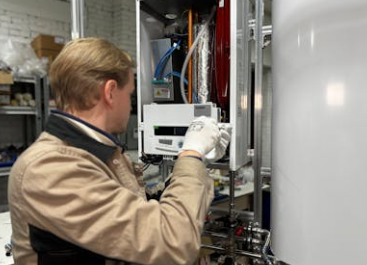
6. Prepare for Professional Installation
While some homeowners attempt DIY freezer installations, hiring professional freezer installation services like S.T.A.R. Appliance Repair guarantees proper setup and prevents common issues. Professionals bring specialized tools, know-how, and experience to:
-
Level the appliance correctly
-
Connect electrical or water lines (if applicable)
-
Test the freezer for proper operation before completing the installation
To further streamline the process, inform your installation team of any special requirements, such as tight spaces or obstacles they need to navigate.
7. Plan for Future Maintenance
A hassle-free freezer installation doesn’t end when the appliance is in place. Planning for maintenance ensures your freezer operates efficiently for years:
-
Keep the area around the freezer clean and free from dust.
-
Avoid overloading the freezer, as this can hinder airflow and affect cooling.
-
Regularly check and clean the condenser coils, either yourself or via professional maintenance services.
By thinking ahead, you not only protect your investment but also reduce the likelihood of costly repairs.
8. Safety Tips for a Smooth Installation
Safety is a critical part of any appliance installation. Keep these tips in mind:
-
Do not lift heavy appliances alone; enlist help to prevent injury.
-
Make sure the freezer is disconnected from power during initial setup.
-
Keep children and pets away from the installation area.
-
Follow manufacturer guidelines for spacing, ventilation, and electrical connections.
S.T.A.R. Appliance Repair ensures all safety protocols are followed, giving you peace of mind during installation.
Conclusion
Preparing your space for a freezer installation doesn’t have to be stressful. By carefully selecting a location, clearing and cleaning the area, measuring accurately, preparing electrical connections, and using professional freezer installation services from S.T.A.R. Appliance Repair, you set the stage for a seamless, hassle-free experience.
Taking the time to plan and prepare not only makes the installation easier but also prolongs the life of your appliance and ensures it operates at peak efficiency. With these steps, your new freezer will be ready to serve your home’s needs for years to come.