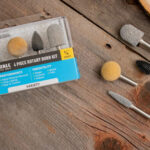
Wood carving is a craft that requires precision, skill, and the right tools. One of the most important tools for detailed carving is the carving burrs for wood carving. These small, rotating tools can make intricate cuts and fine details in wood, allowing woodworkers to bring their creations to life. However, like any tool, carving burrs require proper care and maintenance to ensure they perform at their best and last for a long time. This guide will walk you through how to clean and maintain your carving burrs effectively.
Why Proper Maintenance Is Crucial
Carving burrs for wood carving are designed to handle tough, dense materials, but over time, they can become worn out or clogged with wood dust and debris. Regular cleaning and maintenance not only extend the life of your carving burrs but also ensure smooth and precise cuts in your woodwork. Neglecting these tools can result in inefficient carving, irregular cuts, and, in some cases, permanent damage to the burrs. To keep your grinding burr in top shape, it’s essential to follow a proper cleaning and maintenance routine.
Step 1: Remove Wood Dust and Debris
After each use, it’s important to clean your carving burrs thoroughly to prevent buildup of wood dust and resin, which can dull the cutting edges. Use a soft brush, such as a small paintbrush, to gently sweep away debris. Be careful not to bend or damage the burrs while brushing.
Step 2: Soak the Burrs
For deeper cleaning, especially if your burrs for wood carving have accumulated a lot of resin or pitch from the wood, soaking them is a great option. Fill a container with warm water and a mild soap solution. Place the burrs in the solution and allow them to soak for around 10-15 minutes.
Step 3: Clean with a Brush or Toothbrush
After soaking, use a soft-bristled brush or an old toothbrush to scrub the burrs gently. A gentle scrub will help remove any remaining resin, pitch, or dust. Be careful not to apply too much pressure, as this can bend or damage the burrs.
Step 4: Dry the Burrs Thoroughly
Once your carving burrs for wood carving are clean, dry them thoroughly with a soft cloth or towel. It’s important to ensure that no moisture remains on the burrs, as this can lead to rusting over time, especially if they’re made from steel. After wiping them down, leave the burrs in a well-ventilated area to air dry completely.
Step 5: Lubricate the Burrs
To keep your carving burrs in optimal working condition, lubricating them after cleaning is essential. Applying a small amount of oil, such as light machine oil or motor oil, helps reduce friction and prevents rust. Use a lint-free cloth to apply the oil evenly to the burrs, ensuring it gets into the grooves.
Step 6: Inspect for Damage
After cleaning, take the time to inspect your carving burrs for any signs of damage, such as bent tips, dullness, or cracks. If you notice any issues, it may be time to replace the burrs. Power carving tools are often used in conjunction with carving burrs, so it’s also a good idea to inspect these tools for wear and tear.
Step 7: Store Properly
To keep your carving burrs for wood carving in top shape, proper storage is crucial. Store them in a dry, cool area away from moisture to prevent rust. If you’re using multiple burrs for different carving techniques, labeling them can help you find the right one when you need it.
Conclusion
Proper care and maintenance of your carving burrs are essential for achieving the best results in your wood carving projects. By regularly cleaning, lubricating, and inspecting your tools, you can ensure that they remain in optimal condition and provide smooth, precise carving for years to come. Power carving tools can also complement your carving burrs, allowing you to achieve even more intricate designs.

