Introduction
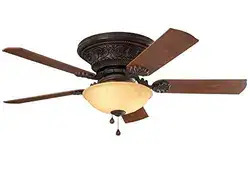
A Harbor Breeze modern ceiling fan is a great addition to any home, offering both stylish aesthetics and functional cooling. With sleek designs, energy-efficient motors, and smart technology, these ceiling fans are perfect for modern living spaces. However, proper installation is key to ensuring safety, efficiency, and optimal performance.
In this article, we’ll walk you through how to install a Harbor Breeze ceiling fan, covering tools, step-by-step instructions, and safety tips. Plus, we’ll share where to find special deals so you can save money on your purchase.
Why Choose a Modern Harbor Breeze Ceiling Fan?
Before diving into the installation process, let’s quickly go over why Harbor Breeze ceiling fans are a popular choice for modern homes:
- Sleek and Contemporary Designs – Brushed nickel, matte black, and wood finishes suit various decor styles.
- Energy Efficiency – Many models come with DC motors and LED lighting to reduce energy costs.
- Smart Features – Wi-Fi-enabled models can be controlled via Google Assistant, Alexa, or mobile apps.
- Quiet Operation – Ideal for bedrooms, offices, and living rooms.
- Affordable Pricing – High quality at a lower cost compared to premium brands.
Tools and Materials Needed for Installation
Before you begin installing your Harbor Breeze ceiling fan, gather the following tools:
✔ Screwdriver (Phillips & Flathead)
✔ Drill and Drill Bits
✔ Wire Strippers
✔ Voltage Tester
✔ Ladder
✔ Ceiling Fan Mounting Bracket (included in the fan kit)
✔ Wire Connectors (usually included)
✔ Harbor Breeze Ceiling Fan Kit
Step-by-Step Guide to Installing a Harbor Breeze Ceiling Fan
Step 1: Turn Off Power at the Circuit Breaker
Safety first! Before working with electrical wiring, turn off power at the circuit breaker to avoid shocks. Use a voltage tester to confirm that no power is running to the wires.
Step 2: Remove the Existing Fixture
If replacing an old ceiling fan or light fixture:
- Unscrew the existing fixture from the electrical box.
- Disconnect all wiring.
- Remove the old mounting bracket (if applicable).
Step 3: Install the Mounting Bracket
- Secure the Harbor Breeze ceiling fan mounting bracket to the electrical box in the ceiling using screws.
- Ensure the bracket is securely attached and can support the fan’s weight.
💡 Tip: If your ceiling fan is heavy, use an approved ceiling fan-rated electrical box for extra support.
Step 4: Assemble the Fan Motor and Blades
- Follow the Harbor Breeze instruction manual to attach the fan blades to the motor housing.
- Some models, like the Harbor Breeze Mazon, come pre-assembled, making installation easier.
Step 5: Connect the Wires
The most important part of the installation process is proper wiring. Most Harbor Breeze fans have color-coded wires, making it easy to connect:
- Black wire (Fan Power) → Black ceiling wire
- Blue wire (Light Power) → Blue or Red ceiling wire
- White wire (Neutral) → White ceiling wire
- Green wire (Ground) → Bare copper or green ceiling wire
Secure connections with wire connectors, ensuring no exposed wires.
💡 Tip: If your fan comes with a remote control receiver, connect it between the fan and power supply before securing the wiring.
Step 6: Attach the Fan to the Bracket
- Lift the fan motor and hook it onto the mounting bracket.
- Tighten all screws to prevent wobbling.
Step 7: Secure the Light Kit (If Applicable)
- If your Harbor Breeze fan has an integrated LED light, simply connect the wires and secure the light kit with screws.
- Install the light cover or glass shade.
Step 8: Install the Fan Blades (If Not Pre-Installed)
- Attach the fan blades to the motor housing using the screws provided.
- Ensure all blades are tightened evenly to avoid wobbling.
Step 9: Turn the Power Back On and Test the Fan
- Restore power at the circuit breaker.
- Use the wall switch or remote control to test fan speed and light operation.
- If your fan wobbles, use the balancing kit included in the package.
💡 Tip: Many Harbor Breeze fans include a reversible motor for summer and winter use—switch the direction as needed.
Where to Get Special Deals on Harbor Breeze Ceiling Fans
Looking for a great deal on a Harbor Breeze ceiling fan? Here are some ways to save money:
1. Check Lowe’s Sales & Promotions
Since Harbor Breeze is a Lowe’s-exclusive brand, the best place to find deals is at Lowe’s stores or online. Look for:
- Seasonal sales (Spring Refresh, Summer Cooling Sale, etc.).
- Clearance discounts on older models.
- Exclusive online coupons for additional savings.
2. Watch for Holiday Sales
Big shopping events like Black Friday, Cyber Monday, and Memorial Day often feature discounts on ceiling fans.
3. Browse Online Marketplaces
Sometimes you can find deals on Amazon, eBay, or Walmart, especially for open-box or refurbished models.
4. Use Lowe’s Price Match Policy
Lowe’s offers a price match guarantee, meaning if you find the same Harbor Breeze fan for a lower price elsewhere, they may match or beat the price.
5. Subscribe for Email Alerts
Sign up for Lowe’s email newsletters to receive exclusive discount codes and flash sale notifications.
Final Thoughts
Installing a Harbor Breeze modern ceiling fan is a straightforward process when you follow the correct steps. With the right tools, proper wiring, and secure mounting, you can enjoy the comfort, energy savings, and modern aesthetics that these fans provide.
Additionally, by shopping smartly and looking for special deals, you can get a high-quality Harbor Breeze ceiling fan at an affordable price. Whether you need a sleek, contemporary fan for your living room or an outdoor fan for your patio, Harbor Breeze has plenty of stylish and energy-efficient options to choose from.